Are you looking for an easy way to create an online event registration form on your WordPress site?
Managing event registrations online simplifies the process for both organizers and attendees.
Whether you’re hosting a seminar, webinar, or workshop, an online form helps collect sign-ups quickly, saves time, and reduces errors.
Skip the spreadsheets—use a WordPress form to automate registrations, send confirmations, and even accept payments for a hassle-free event.
In this guide, we’ll walk you through the step-by-step process of creating an event registration form in WordPress. Whether you’re new or experienced, this tutorial will be easy to follow.
Let’s get started!
Why Use an Online Event Registration Form?
An online event registration form makes event planning easier and more organized. Instead of handling sign-ups manually, you can automate the process and save time.
Here’s why you should use one:
- Saves Time & Reduces Workload: No need to track registrations via emails or spreadsheets. Everything is managed automatically.
- Minimizes Errors: Avoid mistakes like duplicate entries or lost registrations with a structured form.
- Sends Instant Confirmations: Attendees get an automatic confirmation email, reducing follow-ups.
- Accepts Payments Easily: If your event has a fee, you can integrate payment options right into the form.
- Improves Attendee Experience: A smooth registration process makes it easier for people to sign up and attend your event.
By using an online form, you ensure a hassle-free event registration process from start to finish.
How to Create an Online Event Registration Form in WordPress
Step 1: Choose the Right Plugin
To create an efficient online event registration form, selecting the right event plugin is key.
The right plugin will simplify the entire process—from building the form to collecting and managing registrations.
Look for a plugin that is both reliable and easy to use, while offering the features that match your event’s needs.
Here’s what to consider when choosing the perfect plugin:
- Customizable forms for specific event types
- Integrated payment options for paid events
- Automated email confirmations
- Easy event management and attendee tracking
- User-friendly interface, no coding required
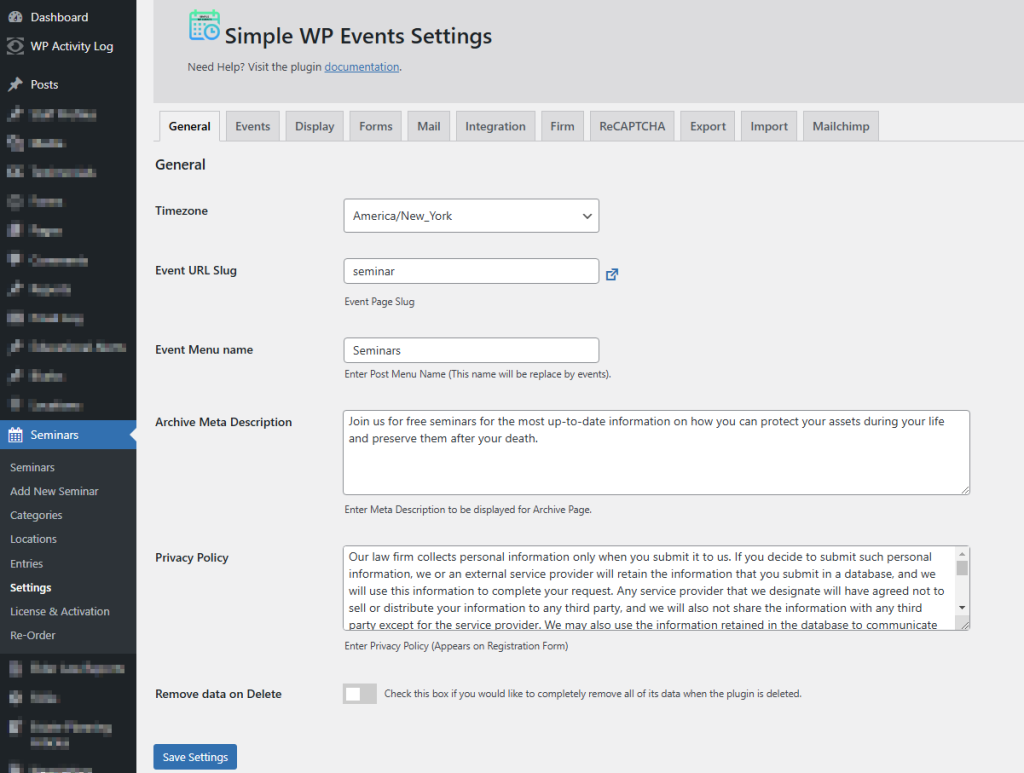
Step 2: Set Up Your Event Registration Plugin
Now that you’ve chosen the right event plugin, it’s time to set up your event registration plugin. Install and activate the plugin, then configure the basic settings to match your event needs.
Customize registration forms, enable payment options, and set up confirmation emails for a seamless experience.
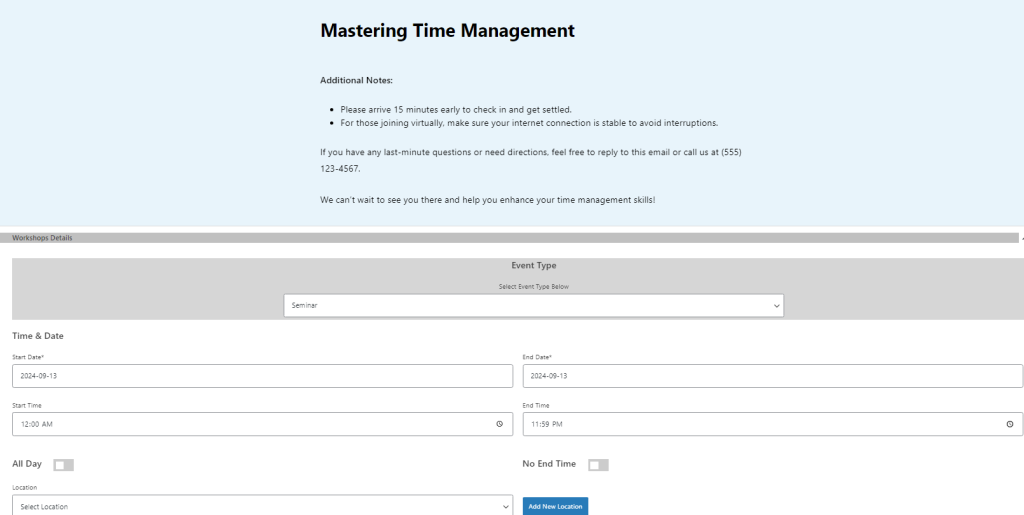
Step 3: Create Your Event and Set Up Key Details
Once your registration form is ready, it’s time to create your event. Ensure everything is set up correctly for a seamless registration experience.
Here are five key tips to help you create a successful event:
- Set the Proper Time and Date: Make sure your event’s date and time are accurate to avoid confusion for your attendees.
- Design a Thank You Page: After registration, redirect attendees to a thank you page confirming their sign-up and offering any additional instructions.
- Write a Clear Event Description: Provide a detailed description of the event so attendees know exactly what to expect, including the agenda or key takeaways.
- Set Up Email Reminders: Send timely reminders to attendees, such as a confirmation email upon registration and a reminder closer to the event date.
- Add Additional Details: Include any relevant details like location (for in-person events), agenda, and links to resources attendees may need.
By following these tips, you ensure your event is organized, your attendees are well-informed, and everything runs smoothly.
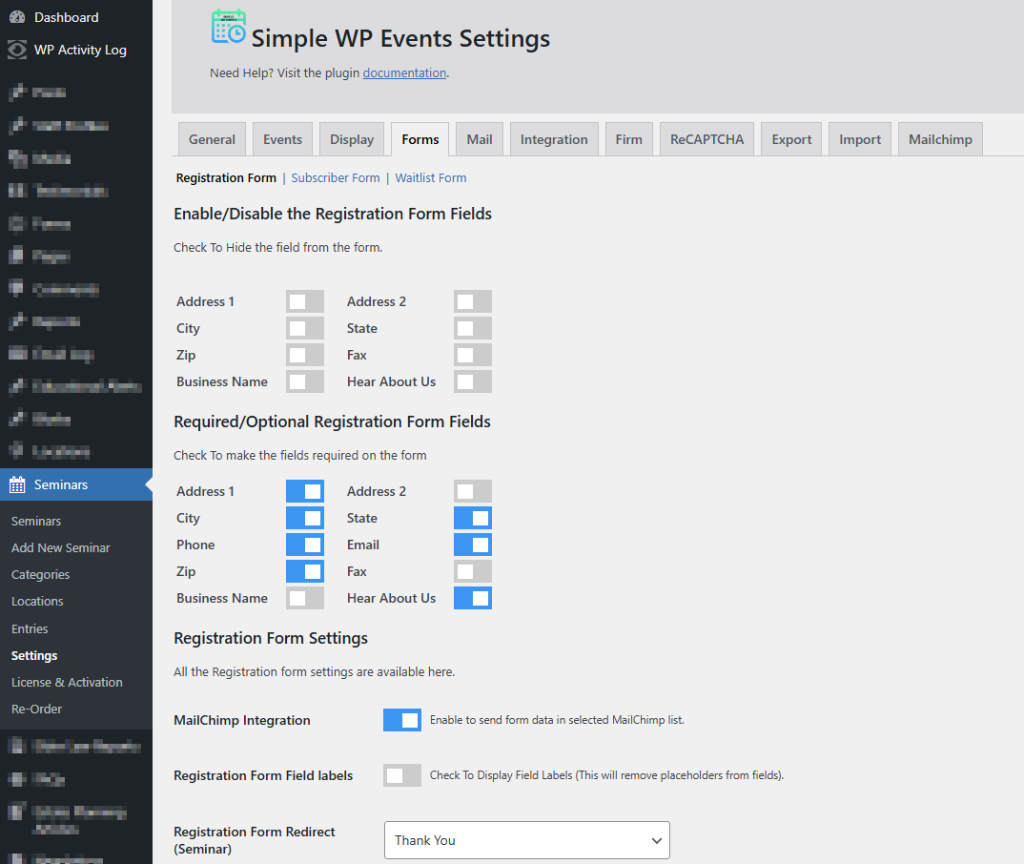
Step 4: Set Up Your Registration Form
Now it’s time to customize your registration form for the best user experience.
By adjusting the settings, you can make certain fields required or optional, and ensure the form matches your event needs.
Follow these steps to customize your registration form:
- Go to Settings: Access the form settings through the Simple WP Events dashboard.
- Enable/Disable Fields: Choose which form fields you want to display. You can enable or disable options like name, email, or phone number.
- Set Required or Optional Fields: Mark fields as required or optional by simply checking or unchecking the boxes for each field.
- Add Custom Fields: Customize the form further by adding or removing fields such as texting permission, how the user heard about the event, or a consent checkbox.
This customization ensures your registration form works perfectly for your audience while providing the flexibility you need for your events.
Once everything looks good, don’t forget to hit Save Changes to store your preferences.
Step 5: Test Your Registration Form
Before going live, it’s crucial to test your registration form to ensure everything functions smoothly.
Testing helps catch any issues, from incorrect redirects to missing confirmation emails, ensuring a seamless experience for your attendees.
Step 6: Promote Your Event, Collect Registrations, and Send Reminders
Once your registration form is set up and tested, it’s time to share your event and start collecting sign-ups. Promote your event across various channels like your website, social media, and email campaigns to maximize attendance.
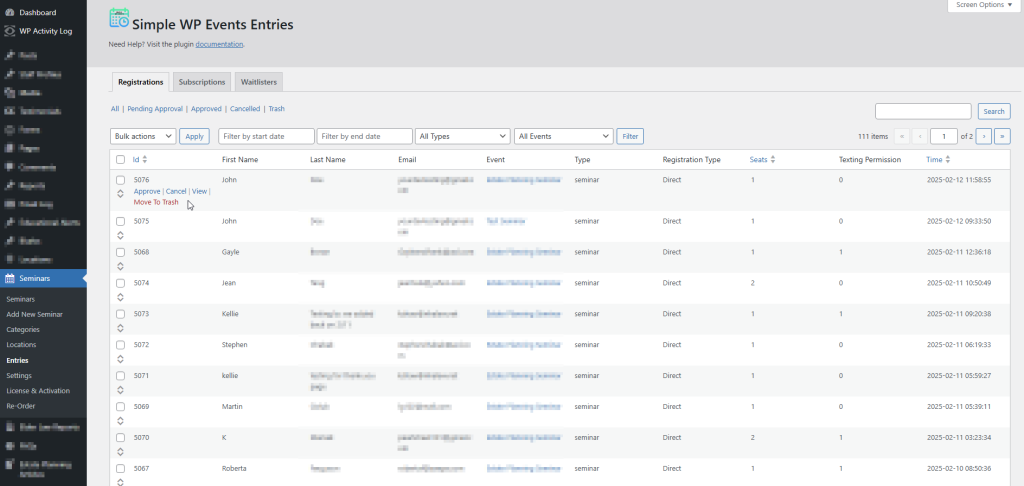
After registrations start coming in, stay organized by managing them through your WordPress dashboard. Track attendees, and ensure that they receive timely reminder emails as the event date approaches.
This helps keep your attendees engaged and reduces no-shows.
Conclusion
Creating an online event registration form in WordPress is a simple yet powerful way to streamline the event planning process.
By following these steps—choosing the right event plugin, setting up your form, customizing registration details, and promoting your event—you can ensure a seamless experience for both organizers and attendees.
With the right setup, your event can run smoothly, and your attendees will appreciate the convenience of easy sign-ups and reminders.
Start using the tools available to you today and watch your events grow effortlessly!
Need help to create an online event registration form on your WordPress site?
Our experts are here to handle everything for you. Let us take the stress out of event management so you can focus on what matters most—seeing the results!

- How to Write an Event Cancellation Email: Examples, Templates & Best Practices - September 18, 2025
- How to Host and Manage Zoom Events Seamlessly? - June 3, 2025
- The Ultimate Guide to WooCommerce Events Calendar Plugins - May 29, 2025


Leave a Reply