All the event registration forms-related settings are available under this tab.
Do you know, the best point is – you customize the settings of the form for your website visitors and subscribers separately?
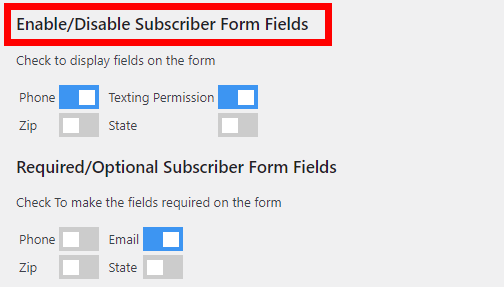
Enable/Disable the Registration Form Fields
You can now customize your registration form easily. Just enable the checkbox for the field which you want to hide from the form.
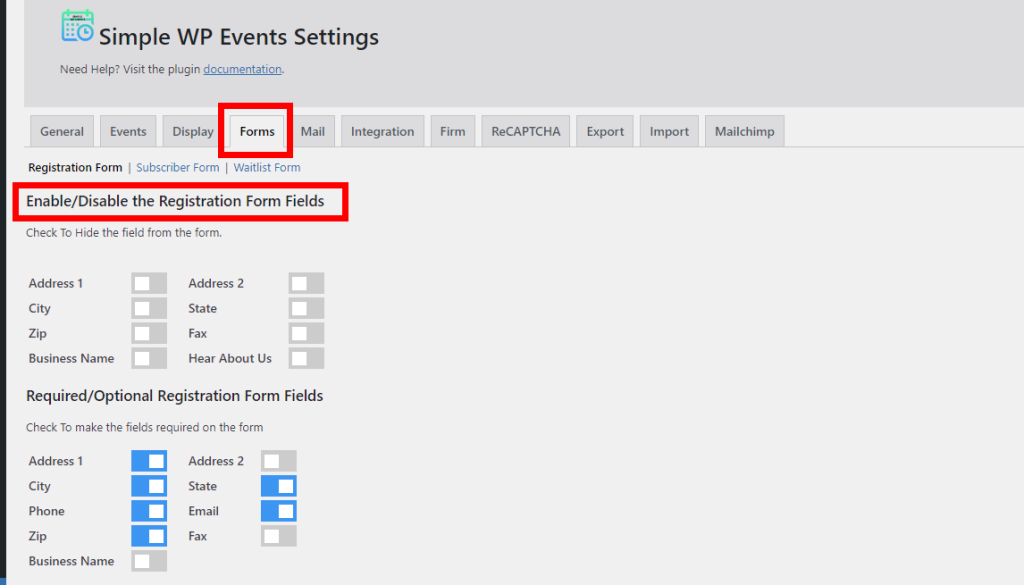
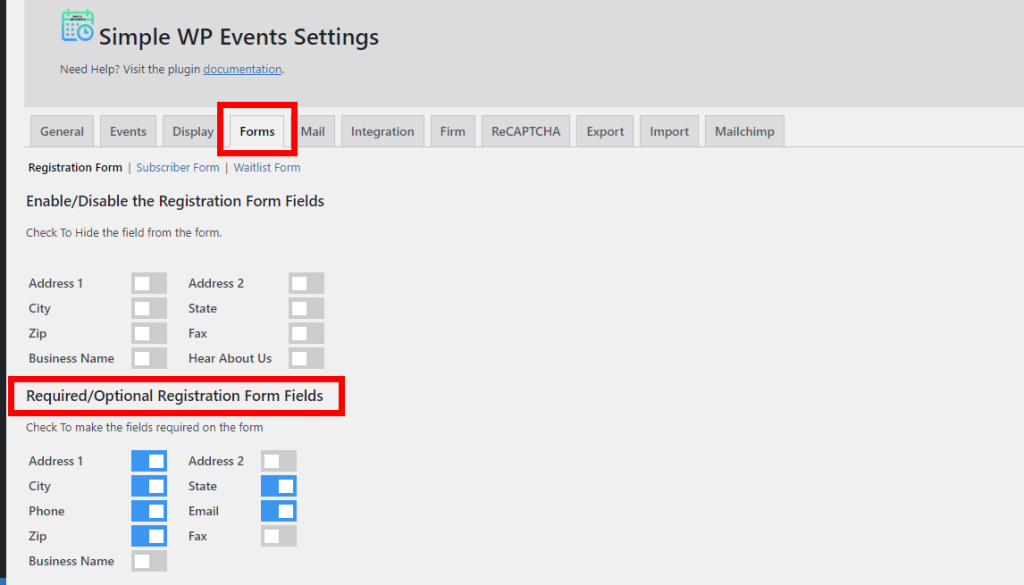
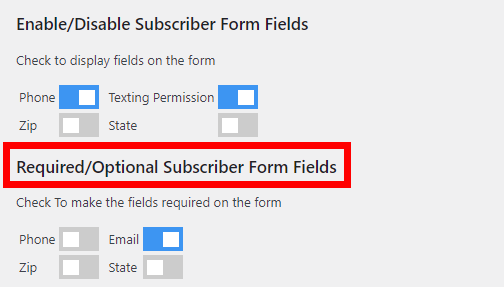
Required/Optional Registration Form Fields
You just need to enable/disable the checkbox for the field to make them required/optional
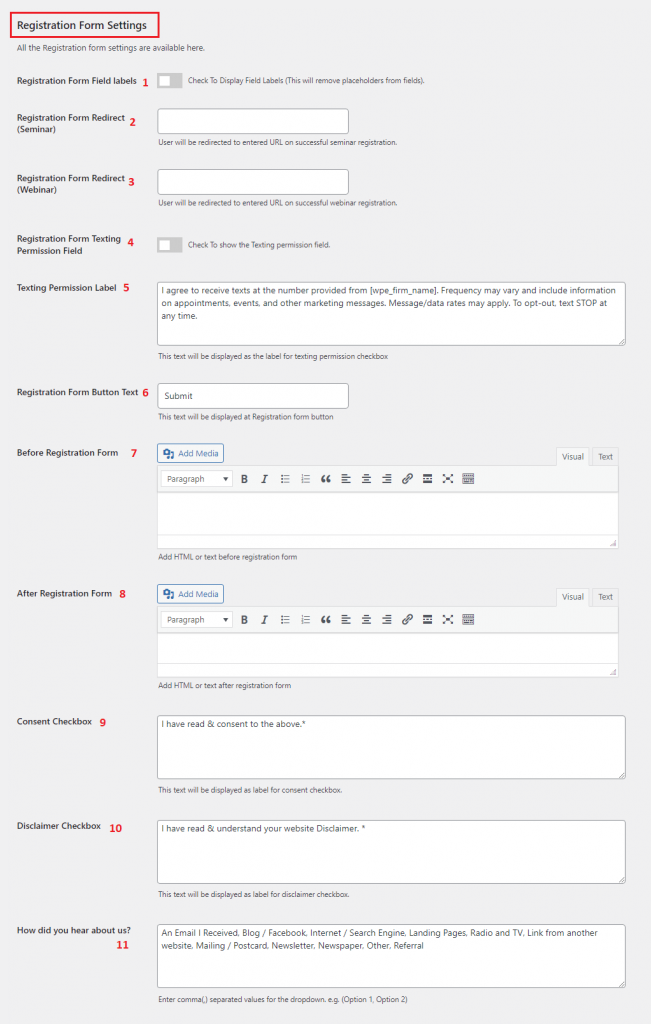
Registration Form Settings
All the Registration form settings are available here – you can customize it according to your requirements.
- MailChimp Integration: Enable this checkbox to send form data in the selected MailChimp list.
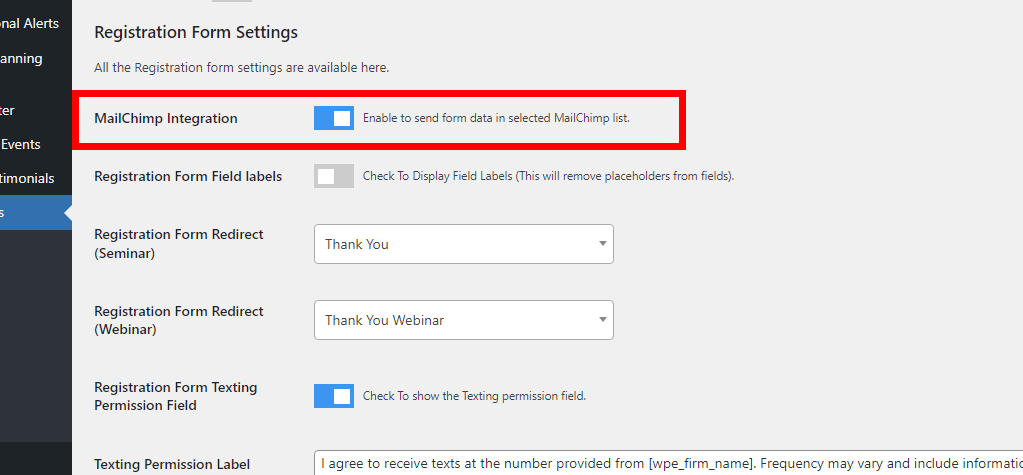
- Registration Form Field labels: If you want to show the field labels – check this. This will remove placeholders from fields. And, if you want to show placeholders, leave it as it is.
- Registration Form Redirect (Seminar): After the seminar registration form submission, If you want to redirect the user to any specific page, then simply select the page URL here. e.g. thank you page etc.
- Registration Form Redirect (Webinar): After the webinar registration form submission, If you want to redirect the user to any specific page, then select the page URL here. e.g. thank you page etc.
- Registration Form Texting Permission Field: Check this tab to enable the texting permission field.
- Texting Permission Label: Add the texting permission label here. This text will be displayed as the label for the texting permission checkbox.
- Registration Form Button Text: Form Buttons have many customization options to fit the needs of your website. This text will be displayed at the Registration form button. Simply add a desired button text in the input field.
- Before Registration Form: If you want to display anything before the registration form, you can do that by adding HTML or text. It could be any notification or alert.
- After Registration Form: If you want to display anything before the registration form, you can do that by adding HTML or text. It could be any kind of terms or conditions.
- Consent Checkbox: Here you can change the text of the consent checkbox displayed in the registration form.
- Disclaimer Checkbox: Here you can change the text of the disclaimer checkbox displayed in the registration form.
- How did you hear about us?: You can customize the options displayed in the dropdown in the registration form.
Enable/Disable Subscriber Form Fields
Check to display fields on the form
Required/Optional Subscriber Form Fields
Check To make the fields required on the form
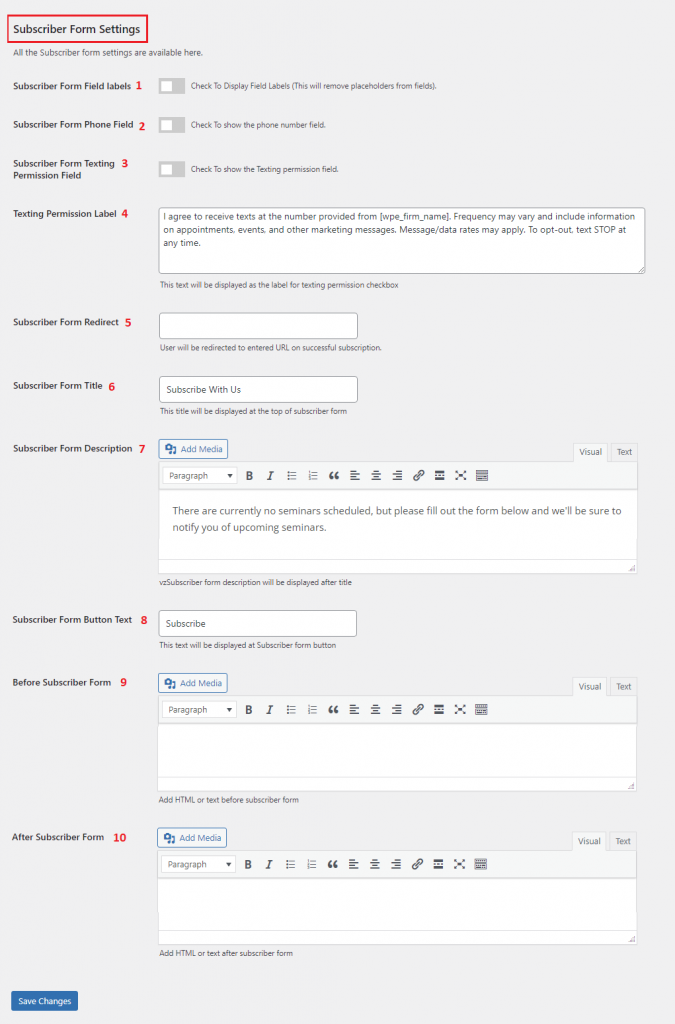
Subscriber Form Settings
All the Subscriber form settings are available here – you can customize it according to your requirements.
- MailChimp Integration: Enable this checkbox to send form data in the selected MailChimp list.
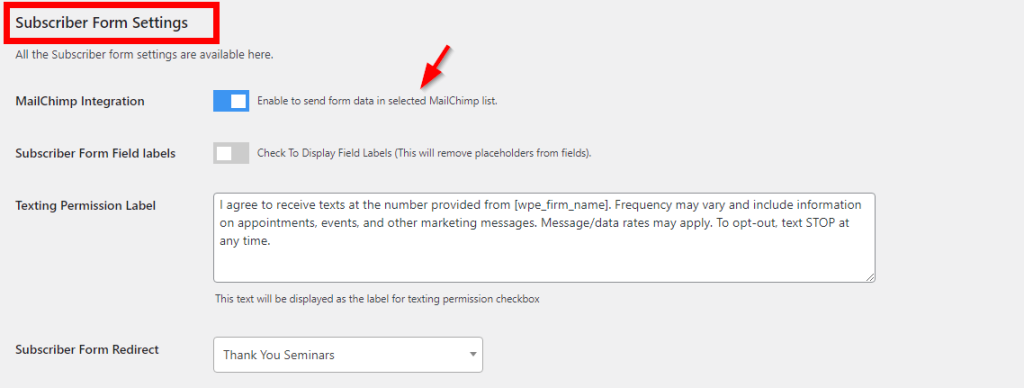
- Subscriber Form Field labels: If you want to show the field labels – check this. This will remove placeholders from fields. And, if you want to show placeholders, leave it as it is.
- Subscriber Form Phone Field: Check this tab to show the phone number field. It will add an additional optional field in your subscriber form as “Cell Phone Number” having an international field type.
- Subscriber Form Texting Permission Field: Check this tab to show the texting permission field. It will add an additional optional checkbox in your subscriber form. Please note that you are not allowed to enable this unless “Subscriber Form Phone Field” is not enabled.
- Texting Permission Label: Add the texting permission label here. This text will be displayed as the label for the texting permission checkbox.
- Subscriber Form Redirect: If you want to redirect your subscribers to any specific page to optimize their experience, then add the page URL here. Don’t forget, It will only redirect your subscriber users.
- Subscriber Form Title: The form title is what respondents will see when they take your form. You can add a customized form title to attract new subscribers. Simply add a form title in the input field and grab the attention of your subscribers.
- Subscriber Form Description: Determine the aim of creating a subscription form by adding its description. You can opt-in subscribers to your mailing list by adding an eye catchy form description.
- Subscriber Form Button Text: Form Buttons have many customization options to fit the needs of your website. Simply add a desired button text in the input field.
- Before Subscriber Form: You can customize the events form specifically for your subscribers. If your want to display anything before the registration form, you can do that by adding HTML or text. It could be any notification or alert.
- After Subscriber Form: If your want to display anything before the registration form, you can do that by adding HTML or text. It could be any kind of terms or conditions. Don’t forget, It will only be for your subscriber users.
Once done, hit the Save Changes button to save your settings.
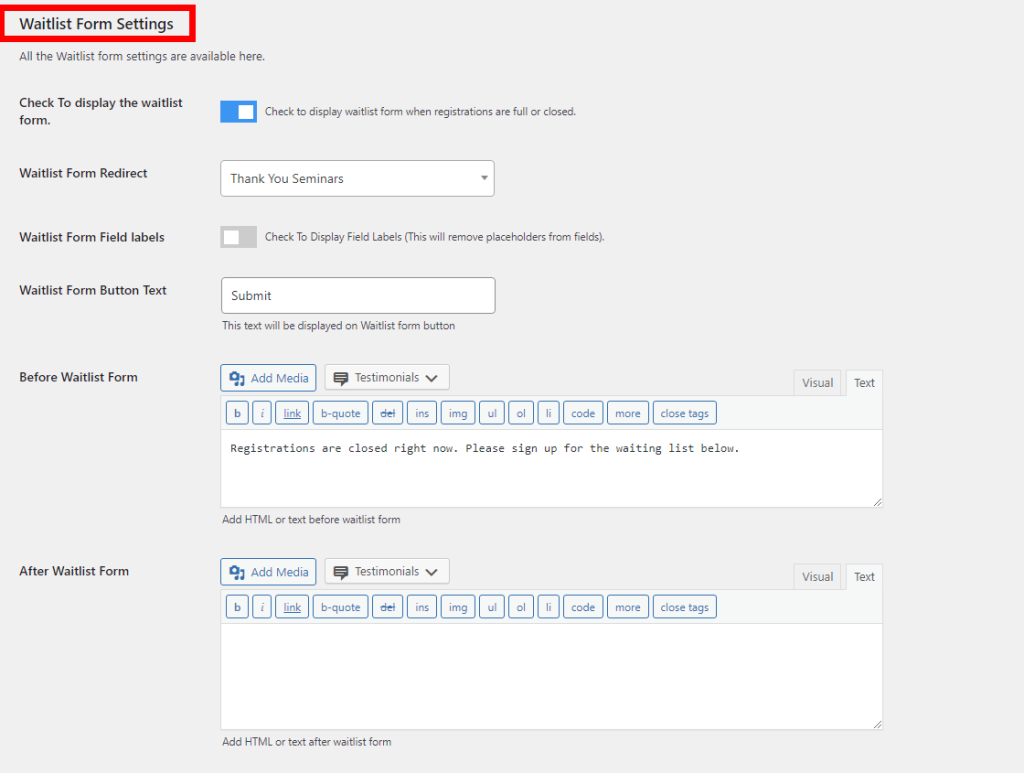
Waitlist Form Settings
All the Waitlist form settings are available here:
- Check To display the waitlist form: Check to display the Waitlist form when registrations are full or closed.
- Waitlist Form Redirect: If you want to redirect your Waitlist to any specific page to optimize their experience, then add the page URL here.
- Waitlist Form Field labels: Check To Display Field Labels (This will remove placeholders from fields).
- Waitlist Form Button Text: This text will be displayed on the Waitlist form button
- Before Waitlist Form: You can customize the text from here. If you want to display anything before the Waitlist form, you can do that by adding HTML or text. It could be any notification or alert.
- After Waitlist Form: You can customize the text from here. If you want to display anything after the Waitlist form, you can do that by adding HTML or text. It could be any notification or alert